

You're probably dealing with a familiar problem. A client repeats a VO2 max test, body fat scan, or Chester Step Test and the result doesn't line up with last month. The immediate temptation is to interpret the number. Training load. Recovery status. Motivation. Nutrition. Sometimes the issue is simpler and less comfortable. The test system changed before the client did.
That's why quality control procedures matter so much in a fitness lab. A metabolic cart, a BodyMetrix ultrasound, a step platform, a metronome app, a pulse monitor, and the person running the session all sit in the same measurement chain. If any one of them drifts, your data stops being defensible.
Most generic QC advice treats all equipment the same or stays too abstract to use on a busy testing day. In practice, a mixed fitness lab needs one framework that covers metabolic testing, body composition tools, and functional field assessments together. It also needs to address two blind spots many organizations overlook: operator drift and post-update verification.
Table of Contents
- Why Flawless QC Is Non-Negotiable in Fitness Testing
- Building Your Lab's QC Framework from the Ground Up
- Actionable Daily Weekly and Monthly QC Checklists
- Beyond the Basics Calibration Validation and Software Updates
- Responding to Failure A Simple Corrective Action Workflow
- The Human Element Minimizing Operator Variance
Why Flawless QC Is Non-Negotiable in Fitness Testing
A bad reading doesn't just create one bad report. It affects programming decisions, return-to-play decisions, research integrity, and client trust. If a Cosmed metabolic analyser reports a lower value than expected, you need to know whether physiology changed or the analyser did. If a Chester Step Test score drops, you need confidence that cadence, step height, heart rate capture, and instructions were all consistent.
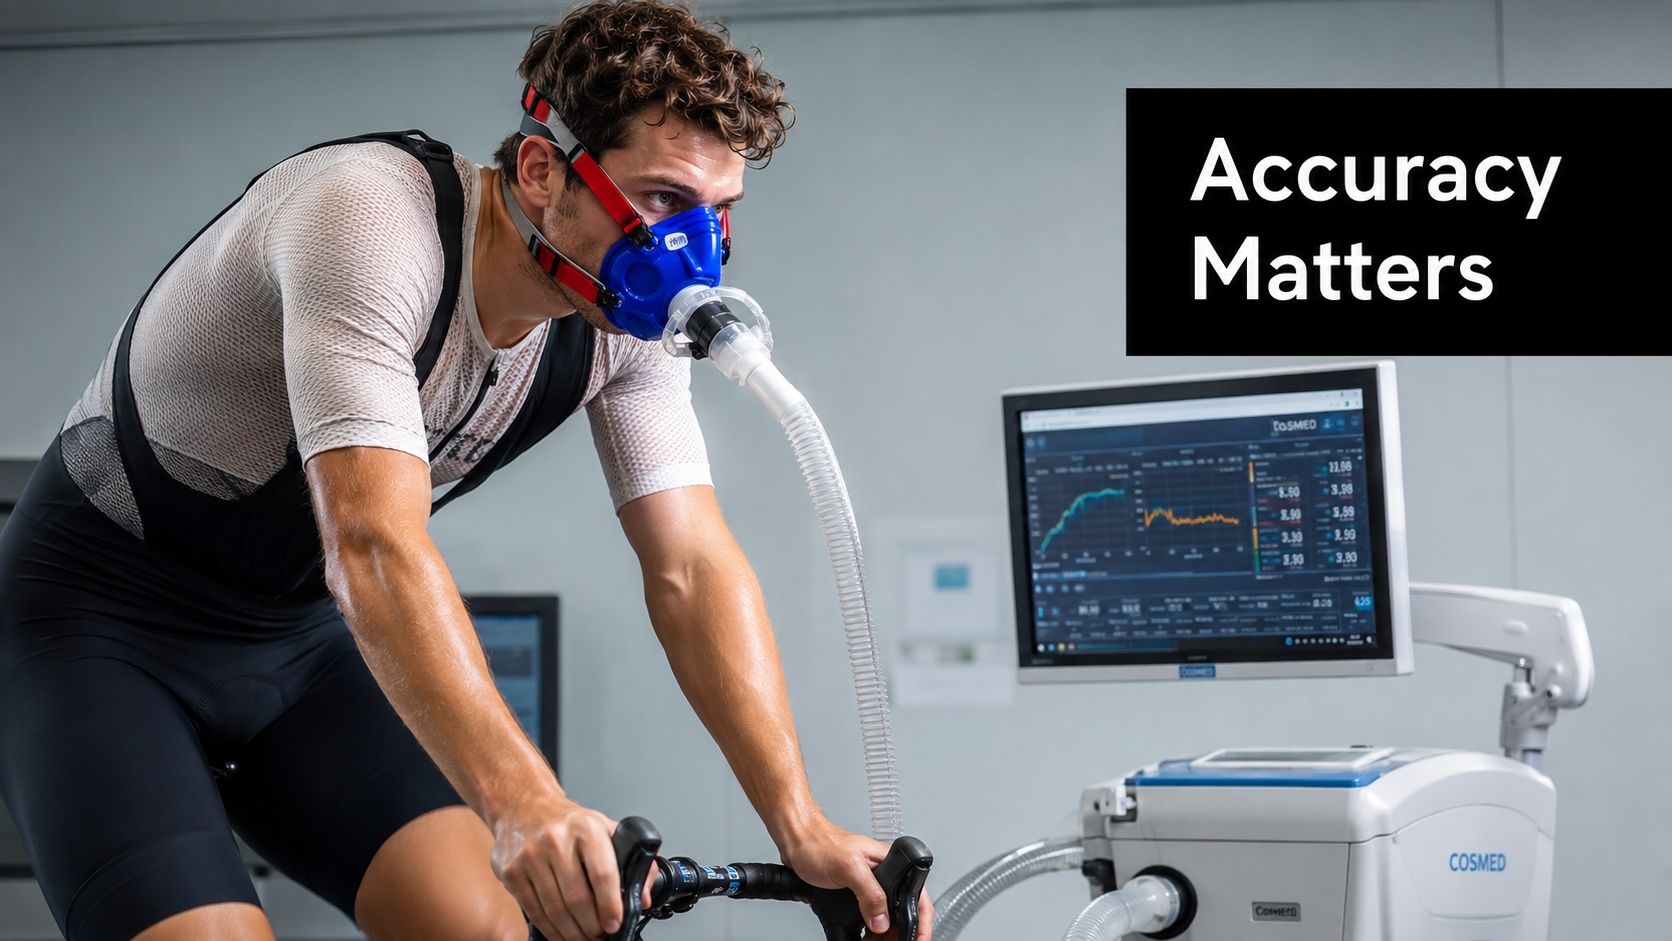
Good quality control procedures date back further than is commonly known. The modern starting point is May 16, 1924, when Walter A. Shewhart of Bell Telephone Laboratories introduced the first modern control chart, shifting quality management from subjective inspection to a data-driven discipline, as outlined by the NIST history of statistical quality control. That matters in a fitness lab because the principle is the same today. You don't wait until the end of testing to discover a problem. You control the process while testing is happening.
What poor QC actually costs you
The biggest cost is uncertainty. You can't confidently compare repeated tests, and once staff lose faith in the system they start making informal adjustments in their heads. That's when standards collapse.
Three failures usually arrive together:
- Client confidence drops when repeated assessments don't make sense.
- Staff improvise instead of following a stable test procedure.
- Records become weak because no one can prove whether the issue was equipment, environment, or operator.
Practical rule: If you can't defend a result to a coach, clinician, or ethics panel, you shouldn't use it to guide decisions.
Cleanliness sits inside QC too. Dirty masks, contaminated contact surfaces, residue on probes, and poorly maintained accessories can interfere with performance and reliability. If your team needs a practical refresher on cleaning routines alongside measurement checks, this guide to disinfecting fitness equipment is useful because it focuses on routine handling rather than vague hygiene advice.
Fitness labs need a lab mindset
A sports performance setting often feels less formal than a clinical lab, but the data burden is similar. If you're collecting physiological or body composition data to compare over time, your procedures need to be documented, repeatable, and reviewable. That includes pre-use checks, environmental awareness, consumable control, and escalation rules when something fails.
A useful starting point is to build your process around a documented assurance pathway such as this overview of medical device quality assurance. The key idea is simple. Reliability doesn't come from one calibration step. It comes from a controlled system.
Building Your Lab's QC Framework from the Ground Up
Most labs don't fail because they lack good intentions. They fail because checks live in different notebooks, one technician knows the actual routine, and nobody has a single source of truth. A workable QC framework fixes that first.
Start with an equipment inventory. List each device and every accessory that can affect results. For a Cosmed system, that means the analyser, flowmeter, mask interfaces, tubing, turbine or flow head, software version, calibration gas, and power supply. For BodyMetrix, include the probe, software build, scanning guides, gel, cables, and phantom if you use one. For field testing, include the Chester Step Test platform, stopwatch or metronome source, heart rate monitor, batteries, and the printed or digital protocol.
Define the critical-to-quality points
In high-precision manufacturing, a Six Sigma approach defines critical-to-quality parameters with tight tolerances such as ±0.05mm, uses statistical sampling with an AQL of 0.65% for critical components, and uses in-process monitoring to reach 98.5% first-pass yield, according to this overview of quality control in manufacturing. You don't need to copy factory language into a sports lab, but the thinking is useful. Decide what absolutely must be right for each test to be valid.
For example:
- Metabolic testing: gas calibration response, flow accuracy, leak-free mask fit, software configuration, environmental input.
- Body composition ultrasound: probe function, image consistency, site marking consistency, software settings, gel compatibility.
- Functional testing: step height, cadence source, timer consistency, heart rate device readiness, script consistency.
Write acceptance criteria before you need them
If you only decide what counts as “close enough” after a failed check, you're not running QC. You're negotiating with error. Each device needs a pass, fail, and hold rule.
Use a central log. Digital is usually easier because it lets you sort by date, device, issue type, and technician. A paper log can work if one person owns it and everyone uses the same fields.
Include these entries every time:
| Equipment Type | Daily Checks | Weekly Checks | Monthly/Quarterly Checks |
|---|---|---|---|
| Metabolic analyser | Visual inspection, warm-up, calibration routine, tubing and mask check | Flow verification, review recent QC records, inspect consumables | Full validation against reference routine, service review, software/version review |
| Body composition ultrasound | Probe inspection, software launch check, cable check, test scan | Consistency scan, accessory review, data spot-check | Phantom or validation routine, deeper maintenance check, protocol review |
| Functional testing tools | Step platform check, cadence/timer check, heart rate device check | Compare timing devices, inspect wear points, review operator consistency | Full SOP review, replacement planning for worn parts, competency check |
Keep documents lean enough to use
The best QC paperwork is short, specific, and impossible to misread. One page beats five pages if staff will follow it under pressure.
A strong starting document set includes:
- Master inventory: every device, serial or ID, location, software version, service status.
- QC schedule: daily, weekly, and monthly or quarterly checks.
- Failure log: what failed, who found it, what happened next.
- Return-to-service form: evidence that the device was verified before reuse.
If your lab also handles reagents, controls, or other consumables, this 2026 guide for lab reagents is useful for thinking about traceability and batch discipline. The same mindset applies to gels, calibration gas, disposable interfaces, and any item that can shift results between sessions.
One practical option for formalising this is a documented lab quality assurance program, especially if you need clearer quarantine, log review, and SOP alignment across multiple testers.
A QC system should make the right action easier than the convenient action.
Actionable Daily Weekly and Monthly QC Checklists
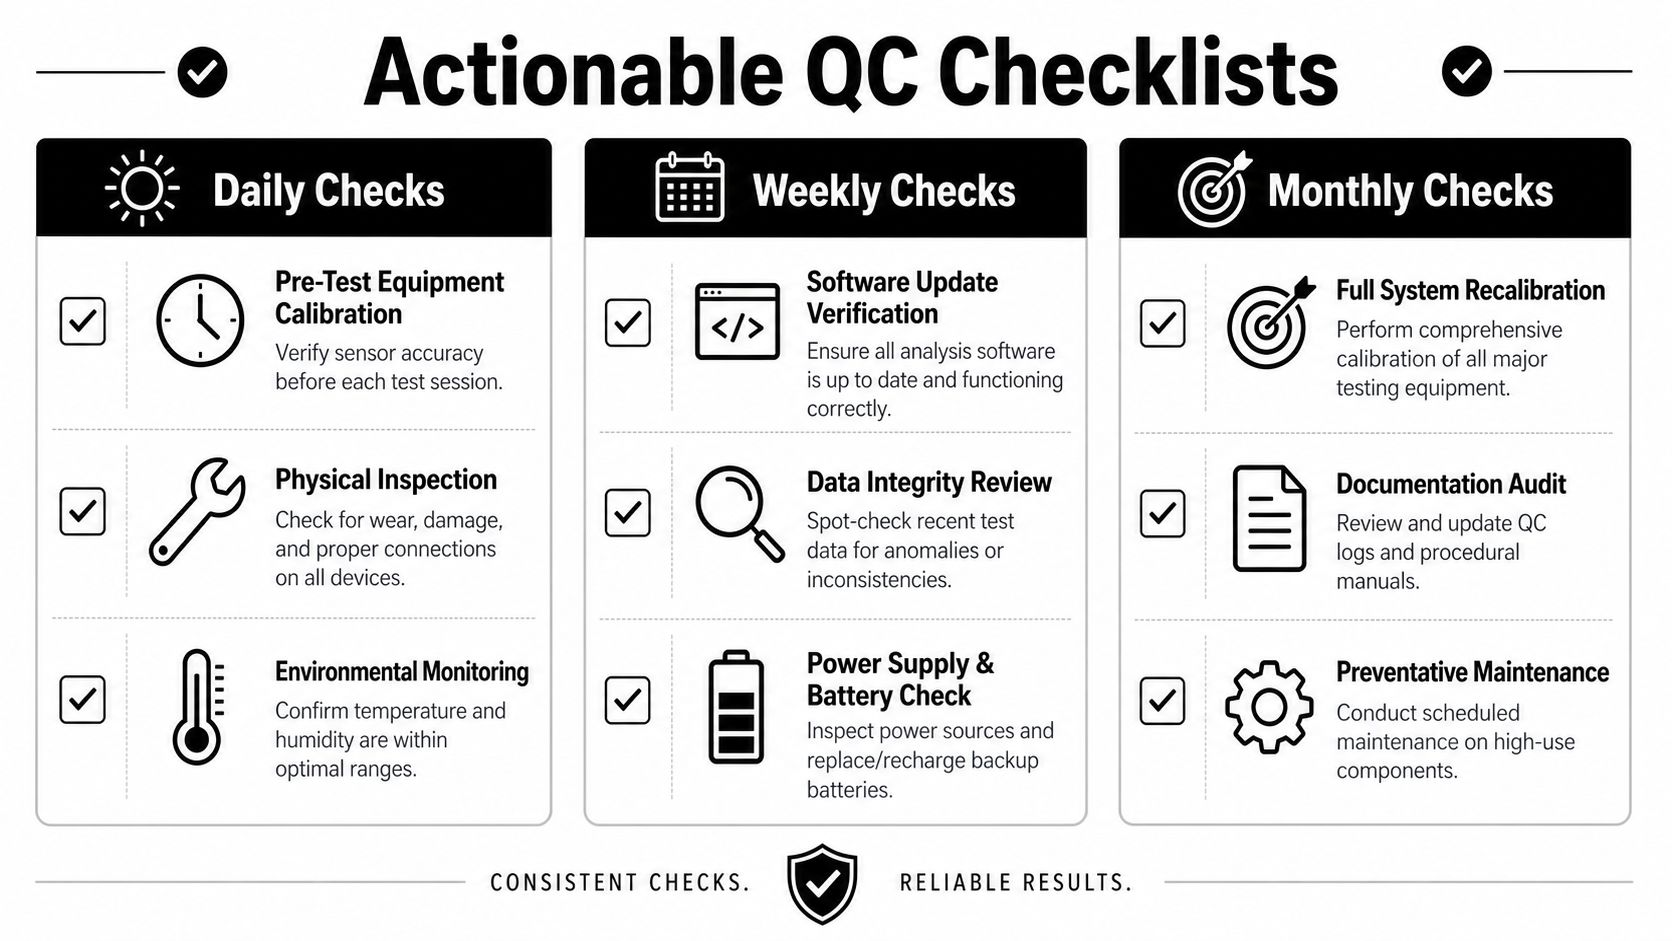
A framework only matters if the team can use it quickly at 7 a.m. before the first test. The easiest way to make quality control procedures stick is to tie them to the actual equipment categories in your lab.
Metabolic systems
For a Cosmed setup or similar analyser, the daily routine needs to happen before client testing begins, not halfway through the first appointment after a suspicious trace appears.
Daily checks
- Inspect the physical setup: look for cracked tubing, loose fittings, worn masks, blocked sampling lines, and damaged connectors.
- Run the standard calibration routine: don't shortcut warm-up or skip prompts because the device “was fine yesterday.”
- Confirm software settings: verify the selected protocol, subject profile fields, and any environmental entries before the first test.
- Check the room: large shifts in room conditions can affect comfort and measurement stability, so note anything unusual in the log.
Weekly checks
- Review trend consistency: scan recent calibration records and test traces for drift, repeated warnings, or unexplained variation.
- Validate flow components: use your standard validation tool and compare against expected behaviour.
- Check accessories as part of the system: masks, headgear, bacterial filters, and cables can create apparent analyser faults.
A visual walkthrough can help new staff understand how structured QC looks in practice:
Monthly checks
- Perform a deeper validation routine: use your established internal method to confirm that calibration is producing believable results, not just accepted prompts.
- Audit the logs: look for repeated minor issues that haven't yet caused a failed test.
- Check service status: make sure the next maintenance point isn't being discovered after performance has already drifted.
Body composition tools
Ultrasound body composition systems fail subtly. You can still get a number, a trace, and a neat report while the process itself has become inconsistent.
The daily goal isn't just power-on confirmation. It's consistency of acquisition.
- Probe and cable condition: inspect for strain, surface wear, and unstable connection points.
- Software launch and preset check: confirm the correct mode and user workflow.
- Test scan: perform a quick internal consistency check before the first client if that's part of your lab routine.
- Consumables ready: make sure the gel or coupling medium is the intended one for the device and not a substitute grabbed from another room.
Weekly, review image quality and site consistency across operators. If one technician routinely creates cleaner scans than another, that's a process issue even if the device itself is fine.
Monthly or quarterly, run your higher-level validation routine. If you use a phantom or another consistency reference, document it the same way every time. Don't rely on memory and don't accept “looks normal” as a QC result.
The dangerous failure mode in body composition testing isn't always a broken probe. It's a believable result produced by an inconsistent method.
Functional testing equipment
Field and submaximal testing tools usually get the weakest QC because they look simple. A step, a timer, and a heart rate monitor don't feel like lab equipment. They are still measurement tools.
For Chester Step Test and similar protocols, control these points:
- Step platform condition: confirm the platform is stable, level, and the correct height for your protocol.
- Cadence source: check the metronome, audio file, or timing app before the session starts.
- Heart rate capture: ensure the device pairs properly, displays consistently, and won't die mid-test.
- Printed or digital script: use the same cueing language every time.
Weekly, compare your timing tools against each other and inspect common wear points such as platform feet, surface grip, and cable integrity for any connected sensors.
Monthly, review the full test SOP with the staff who run it. Functional testing doesn't tolerate “I usually say it this way” very well. That's where drift begins.
A simple division of responsibilities helps here:
| Check Frequency | Best Owner | Main Aim |
|---|---|---|
| Daily | Session technician | Catch obvious faults before testing |
| Weekly | Senior technician or lab lead | Spot trends and recurring inconsistencies |
| Monthly | Lab manager or delegated reviewer | Confirm the system is still defensible and aligned with SOPs |
Beyond the Basics Calibration Validation and Software Updates
The common mistake is to treat calibration as the finish line. It isn't. A device can complete a calibration sequence and still produce unreliable results in day-to-day use. That's why strong quality control procedures separate calibration, validation, and change control.
Calibration and validation are not the same job
Calibration is adjustment against a known reference or standard process. Validation is proof that the whole system still produces acceptable results under real operating conditions. In practice, calibration asks, “Did the device align?” Validation asks, “Can we trust what comes out of it now?”
That distinction matters most after something changes. New software. New batch of consumables. New sensors. New probe accessory. New room setup. New laptop. Staff often treat these as admin details. They're QC events.
In clinical settings, 60% of metabolic analyzer errors are linked to unverified software or reagent lot changes, and medical QC protocols from CLIA and WHO require verification for each new lot number or software update, as discussed in this WHO-linked quality control reference. Fitness settings often miss this completely, especially with metabolic carts and software-driven tools.
A simple software-lot QC protocol
Use this any time your analyser software updates, your body composition platform changes version, or you open a new batch of a critical consumable.
Quarantine first use
Don't roll the change straight into live client testing. Mark the device or consumable as pending verification.Record exactly what changed
Note the previous version or lot, the new version or lot, the date, and who made the change.Run a controlled verification
Use your standard internal check routine under routine conditions. Keep the setup ordinary. If you change too many variables at once, you learn nothing.Compare to your recent baseline
You're checking for unexplained shifts, unusual warnings, altered workflow prompts, or output that no longer behaves as expected.Release or hold
If results align with expectations, return it to service. If not, hold the device and escalate.
This discipline is especially useful for labs running integrated systems with software-led calculations. A harmless-looking update can change data handling, unit defaults, or workflow prompts. If you want a formal reference point for this sort of process, a documented medical device validation process gives you the right structure for pre-use verification after change.
A final point many teams miss: consumables count too. Calibration gas, gels, mouthpieces, filters, and any item that interacts with measurement should sit inside your change-control routine if a different lot could alter performance.
Responding to Failure A Simple Corrective Action Workflow
A failed QC check usually shows up at the worst time. The first client is due in ten minutes, the metabolic cart throws a calibration error, and someone suggests running “just one test” while you sort it out. That is how bad data gets into a system and stays there.
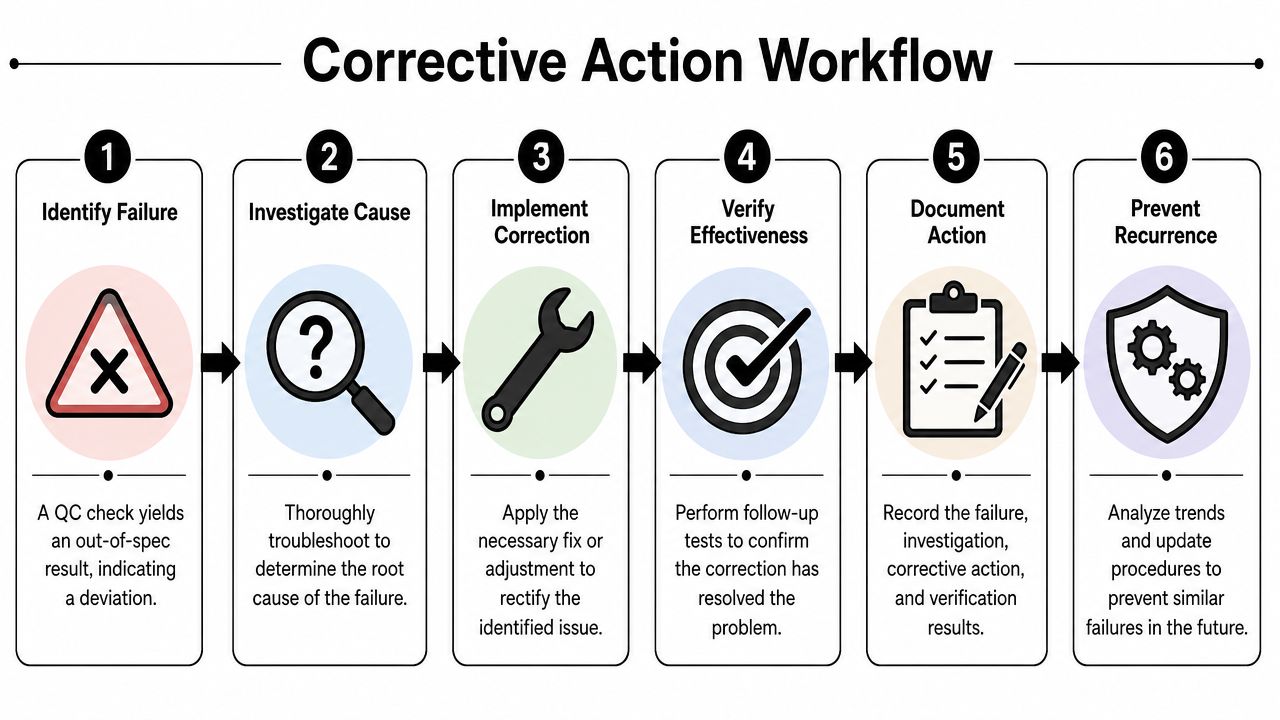
The correct response is simple. Stop testing on that device until you know what failed, what it affected, and whether the fix holds under normal use. In a mixed fitness lab, that applies equally to a gas analyser, a body composition system, a force plate, or an ultrasound unit. Different devices fail in different ways, but the workflow should stay consistent.
What to do the moment a QC check fails
Use the same sequence every time:
- Hold the device out of service: label it clearly so the next operator does not put it back into use by habit.
- Record the failure properly: capture the exact error, the test condition, the operator, the accessories in use, and the time.
- Check the full chain: inspect the device, leads, tubing, sensors, consumables, recent cleaning, room conditions, and operator setup.
- Identify recent changes: software updates, swapped cables, new filters, fresh calibration gas, and different consumable lots all belong in the review.
- Correct the confirmed cause: replace the faulty part, fix the setup, clean the component, restore the right configuration, or retrain the operator.
- Verify before release: repeat the required QC checks and, if appropriate, a known-good functional test before the device returns to live testing.
- Close the loop: update the SOP, checklist, or training record if the failure exposed a weakness in the process.
That last step matters more than many labs admit. If a body comp device fails because electrodes were stored poorly, the problem is not only the failed test. It is also a storage and handling gap that will keep showing up until someone changes the routine.
A formal CAPA process in regulated settings follows the same logic. This CAPA guide for manufacturing quality control is not written for fitness labs, but the discipline carries across well. Contain the issue, find the cause, confirm the fix, then change the process so the failure is less likely to recur.
A practical example
Take a metabolic cart that fails its morning gas calibration. Pull it from the schedule first. Then work the problem in order: cylinder pressure, regulator connection, tubing integrity, water trap condition, analyser warm-up status, software settings, and any change made since the last accepted check.
Do not stop at the hardware.
If the cart passed yesterday and failed after an overnight software patch, that software change is part of the investigation. If a new box of bacterial filters was opened that morning, that lot change is part of the investigation. If one technician assembled the setup differently after mobile testing, the operator handover is part of the investigation. Good corrective action looks at the whole measurement chain, including the person running it.
The same logic applies outside metabolic testing. If a BodyMetrix unit starts giving unstable readings, check probe condition, site marking, gel, subject position, and whether two operators are using slightly different scan angles. If a force plate baseline drifts, inspect levelling, cable seating, firmware status, and the laptop power settings before calling it a hardware fault.
Ask one question first. What changed?
Once you correct the issue, run the return-to-service check exactly as written in your lab SOP. Log the result, who verified it, and any restrictions on use. If the device passes, release it. If it fails again or the cause is still uncertain, keep it out of service and escalate to technical support or a senior reviewer.
The Human Element Minimizing Operator Variance
A well-calibrated device can still produce poor data if the operator varies the method. This is the weak point in many fitness labs because hardware gets attention and administration technique gets treated as personal style.
Data discussed in this review of human variance in quality control procedures suggests 30-40% of “equipment failure” in performance testing stems from unmonitored procedural drift by the human operator. That finding fits what many labs see in practice. The analyser gets blamed first. The script, timing, site marking, coaching tone, and setup order get ignored.
Where operator drift shows up
It usually appears in small changes that nobody notices at the time:
- Cueing changes: one technician gives sharper pacing cues during a step test than another.
- Mask fitting habits: one person checks leaks carefully, another assumes the strap tension is enough.
- Ultrasound site location: one operator is disciplined about landmarks, another estimates.
- Test termination decisions: one tester pushes for consistency, another stops early on subjective judgement.
Those differences can shift outcomes enough to make repeated measures less trustworthy.
How to tighten the human side of QC
Start with written SOPs that are short, current, and used in the room. Then standardise the moments that most influence results.
Use a simple operator control system:
- Script the critical phrases for each test, especially instructions, pacing cues, and stop criteria.
- Train by observation, not just reading. New staff should demonstrate the protocol, not just sign that they read it.
- Run competency checks where another trained staff member watches the full setup and delivery.
- Audit live practice periodically. People drift gradually.
- Review outliers with curiosity. If one operator's data always looks different, investigate the method before blaming the client group.
The aim isn't robotic delivery. It's controlled delivery. A client can still get a human, encouraging experience while the measurement process stays consistent.
Reliable testing data doesn't come from one good device. It comes from controlled routines, documented checks, disciplined response to failures, and staff who treat procedure as part of the instrument. If you need equipment, validation support, or a more structured QC setup for metabolic, body composition, or functional testing workflows, Cartwright Fitness provides validated testing systems and support built around accurate, repeatable measurement.


